Baking at the 20th Century Cafe Cookbook Giveaway
November 19, 2020 by JennyEnter our US/CA giveaway to win one of three copies of Baking at the 20th Century Cafe: Iconic European Desserts from Linzer Torte to Honey Cake by Michelle Polzine. This beautiful book made my best books of 2020 as well as my baker’s gift guide. This year there has been a wealth of jaw-dropping baking titles and Baking at the 20th Century Cafe is right at the top of the list.

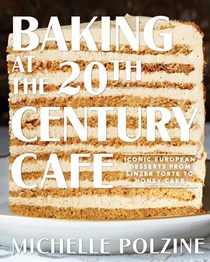
This book is a baker’s dream – the holy grail of baking. Just look at that cover of that luscious honey cake. Polzine, one of San Francisco’s best pastry chefs, pays homage to the foundational desserts of so many cultures while lightening and modernizing the recipes through her California lens. This is the European dessert bible every baker needs. The book is stunning on steroids – with a gorgeous clear book jacket to keep it as pristine as possible while it is propped open on your counter creating desserts that will wow and impress.
If you are a one-bowl baker, this may not be the book for you. If you enjoy rolling up your sleeves and creating showstopping desserts then buy it now! Don’t get me wrong, there are times when I love an easy recipe but books like Baking at the 20th Century Cafe are pure inspiration. In this title, there are less arduous recipes such as Cacao nib meringue kisses, Coconut rice pudding baked in a fig leaf, and Butterscotch pudding to name a few. But what really blows up my skirt are the more challenging recipes like the Walnut-apricot torte, Date-pistachio torte (I bought all the ingredients to make this torte too), or the famed Honey cake.
The honey cake is on my menu for Thanksgiving next week. I made sure I bought tons of cream and extra honey on a big shopping trip. But then Jane made the cake a week ago which tempted me to forget my plans for the holiday and make it the very next day – an ordinary Tuesday. But I didn’t – I figured I should feed my boys dinner instead of abandoning their meal for cake prep. However, come next Wednesday, this cake will be mine! It has to sit in the fridge overnight so it will be there waiting for our Thanksgiving dessert. I’ll need to install an alarm on the garage fridge should my teenaged son try to steal a piece.
The author recommends that you read each recipe twice and as you are recreating the recipes to make notes in the book itself. Polzine feels that a recipe is a living thing and she continuously works on tweaking recipes to make them better. Maybe there is that one thing that you, as the baker, will change up and love – make a note (and share that note on the recipe here at EYB).
Other highlights:
- measurements are given in weights and volume
- the recipes in the fruit and strudel chapter are arranged seasonally
- numerous process photos showing a technique or process
- detailed instructions whether it be a jam recipe or an elaborate dessert, for example, there are 10 pages devoted to strudel, the pastry, stretching, and the recipe for apple strudel
- tutorials on certain ingredients, i.e. “Eggs 101”
- the photographs are stunning
- the recipes are dreamy
Growing up there were not many homemade baked goods in my home. It was a big deal when my mom would fry canned biscuits to make donuts. My grandmother was of Eastern European heritage and occasionally a poppy seed roll or nut roll would materialize on our kitchen table. Michelle’s recipes remind me of those baked treats that I attribute to my grandmother, especially the Poppy seed rugelach, the Walnut Hamentaschen, and the Flódni.
The Flódni is a multilayered affair made for special occasions. It requires four fillings as well as a pastry dough. Now, believe me, no member of my family has ever made a Flódni but those fillings – poppy seed, walnut, apple butter, and plum levkar all evoke memories of those errant desserts that my grandmother would produce. Perhaps she purchased them from our hometown bakery, I never knew where they originated – I only recall that they were related to my grandmother.
I have read this magnificent book two times and each time I find something new to rejoice in. Polzine’s trips to Europe where she would eat at pastry shops and cafes sound delightful. We are so lucky that we get to imagine those trips as we read her words and make her recipes.
Special thanks to Artisan for providing the honey cake recipe for our members as well as offering three copies of this title in our giveaway below.
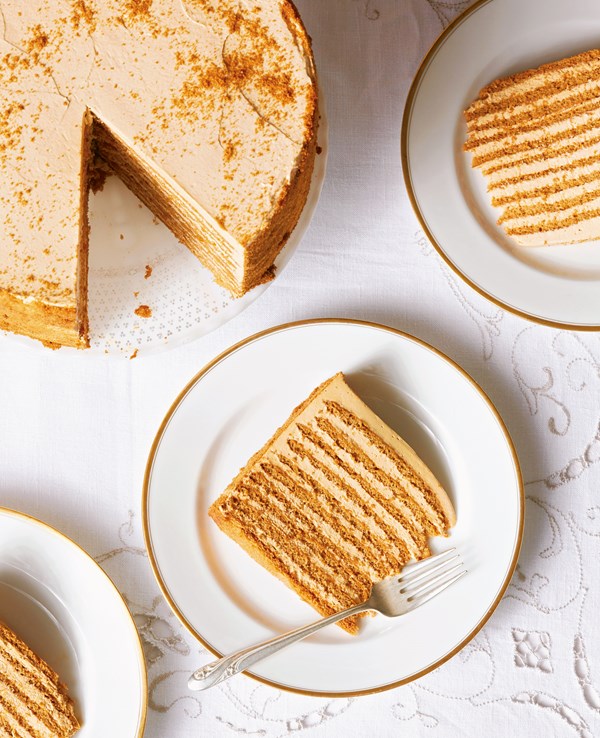
Honey cake
Add this recipe to your Bookshelf (click the blue +Bookshelf button).

I am not boasting when I say this cake will knock your socks off, and wash and fold them too. Well, I suppose I am boasting, but this is one hell of a cake. Despite its grandeur, it’s not too difficult to make at home, although it does require a very significant time commitment, especially on your first try, so make it for someone who deserves it. Like yourself!
And even if you are the fastest baker in the world, you still cannot serve this cake the same day you make it, so plan ahead.
All that said—don’t be intimidated! The cake is composed of ten layers (yes, you will need lots of counter space), made from a batter that you spread free-form onto sheets of parchment (the method is similar to the way you make the layers for the Dobos Torta on page 131). The tender layers are sandwiched together with a light cream frosting flavored with dulce de leche and burnt honey. Your labors will be richly rewarded: This is a beautiful, impressive, delicious cake.
Makes one very tall 9½-inch (24-centimeter) cake; serves 16 to 20
For the Burnt Honey
- ¾ cup plus 2 tablespoons (200 milliliters) wildflower (or other mild) honey
- 2 tablespoons (30 milliliters) water, plus more as needed
For the Cake
- 2/3 cup (150 milliliters) wildflower (or other mild) honey
- ¼ cup (50 milliliters) Burnt Honey (from above)
- ¾ cup plus 1 tablespoon (165 grams) sugar
- 11½ tablespoons (168 grams) cold unsalted butter, cubed
- 5 large eggs
- 1¾ teaspoons baking soda
- 1¼ teaspoons kosher salt
- 1 teaspoon ground cinnamon
- 1 tablespoon (15 milliliters) cold water
- 3 cups (360 grams) all-purpose flour
For the Honey Magic Frosting
- 1 recipe Dulce de Leche (recipe follows) or one 14-ounce (396-gram) can store-bought dulce de leche
- ½ cup (118 milliliters) Burnt Honey (from above)
- 1 teaspoon kosher salt
- 6 cups (1.42 liters) heavy cream
Preheat the oven to 375°F (190°C). With a dark marker, trace ten 9-inch (23-centimeter) circles onto ten 11-by-17-inch (28-by-44-centimeter) sheets of parchment; flip the sheets over.
Make the burnt honey: Put the honey in a medium saucepan and bring to a simmer. It will foam up like crazy; continue cooking, stirring, until it starts to color. Now pay close attention: Keep simmering, stirring occasionally with a wooden spoon or heatproof spatula. Once the honey starts to smoke, reduce the heat to low and let it cook for 30 seconds longer. Remove from the heat and carefully swirl the honey in the pan for about a minute, to release some of the heat, then set the pan down and pour in the water, staying way the hell out of the way; it will steam and sizzle! Once the honey stops bubbling like it’s going to kill you, give it a stir and pour it into a heatproof measuring cup. Stir in enough hot water to make ¾ cup plus 2 tablespoons (200 milliliters) burnt honey. (The burnt honey can be made ahead; stored at room temperature, it will keep indefinitely.)
Make the cake: In a medium heatproof bowl, combine the honey, burnt honey, sugar, and butter and set the bowl over a pot of simmering water. Crack the eggs into a separate bowl and set aside. In a small bowl, combine the baking soda, salt, and cinnamon.
Whisk the honey and butter mixture. When the butter has melted and the mixture is hot to the touch (but not so hot it will burn you), add the eggs all at once while whisking. Continue whisking until the mixture is once again hot to the touch, then whisk in the baking soda mixture: The mixture will look a little foamy and smell kind of weird. (When I taught this cake to my pal Samin Nosrat, she described it as having a “curious odor.”) Remove from the heat, whisk in the cold water, and let cool until warm but not hot.
With a fine-mesh sieve or sifter, sift the flour over the batter and whisk it in until it is perfectly smooth. Do not worry about overmixing.
Using an ice cream scoop or a measuring cup, scoop about ⅓ cup (90 grams) of the batter into the center of each of the traced circles on the pieces of parchment. With a small offset spatula, spread the batter into thin even circles. Transfer two of the pieces of parchment to sheet pans and bake, rotating the pans at the halfway point, until the cake layers spring back when lightly pressed, 6½ to 7 minutes (it may take up to 1 minute longer, but remember: You can bake it more but not bake it less, and subsequent layers, baked on warm sheet pans, may take less time). Remove the baked layers from the sheet pans (still on their parchment) and let cool. Repeat the baking process with the remaining layers. I find it easier to peel the layers off the parchment when they are warm, but do not stack the layers until they are completely cool (yes, you will have layers on every surface—clear space!).
Turn off your oven and let it cool for 10 minutes. Take your least favorite layer, slide it onto a parchment-lined sheet pan, return it to the oven, and toast it (in the turned-off oven) until it’s a nice reddish brown and very dry. Remove from the oven and let cool, then grind the layer into crumbs in a food processor, or just crush between sheets of parchment with a rolling pin.
Make the frosting: In the bowl of a stand mixer fitted with the paddle attachment (or in a large bowl, using a handheld mixer), combine the dulce de leche, burnt honey, and salt and beat on medium speed until smooth. With the mixer on low speed, slowly add ¾ cup (178 milliliters) of the cream and mix until homogeneous. Transfer to a bowl and refrigerate, along with the mixing bowl, until chilled; keep the mixer bowl or the large bowl cold in the fridge. (The magic can be made ahead to this point and stored in an airtight container in the fridge for up to 2 weeks, or in the freezer for up to 2 months.)
Switch to the whisk attachment if using the stand mixer and, in the chilled mixer bowl (or the large bowl, using the handheld mixer), whip the remaining 5¼ cups (1.18 liters) cream to soft peaks. Gradually pour in the chilled honey mixture and whip until the cream again holds soft peaks. It should be very glossy but hold a nice mound. Refrigerate the frosting while you prepare to assemble the cake.
You can assemble the cake on a 9-inch (23-centimeter) cardboard round or directly on a cake plate, but beware that this is a very tall cake and your cake dome might not cover it; at the cafe, I build the cakes on cardboard rounds and store them in Tupperware cake holders.
Place your first cake layer on your building surface of choice and place about 1 heaping cup (150 to 160 grams) of frosting on top. Spread the frosting evenly across the cake layer, all the way to the edges. It’s okay, and even helpful, if you go over the edges a little, which will help you finish the outside of the cake easily. The idea is to have equal parts cake and frosting. Top with a second cake layer, and repeat the spreading and stacking process until you’ve stacked and frosted all 10 layers.
Using a bench scraper (and a cake turntable if you have one), hold the bench scraper at a right angle to the cake plate and go around the cake, pushing those extra bits of frosting into any cracks as you go, smoothing the cake and straightening the layers by pushing them this way and that, until your frosting is perfectly smooth and your layers are all aligned. Don’t worry, though, if the edges of a few of the cake layers are peeking out from beneath the frosting; the final coating of crumbs will hide it all. I do a luscious grandmotherly type frosting flourish on the top, like in the picture on the cake mix boxes from my childhood.
Pick up a handful of the cake crumbs and gently press onto the sides of the cake, re-scooping the ones that fall, going all the way around the cake, and using the remaining crumbs, until the sides are completely coated. I do a final little sprinkle on top, as if it fell from the sky onto my cake.
Okay, this is the worst part: Put it in the fridge until tomorrow. You cannot eat this cake the day you make it. You must satisfy yourself with fallen crumbs and blobs of frosting. (The cake can be refrigerated for up to 2 days.)
When you’re ready to serve it, remove the cake from the fridge, admire your brilliance, and slice into wedges.
Dulce de Leche
To make dulce de leche, place an unopened 14-ounce (396 gram) can of sweetened condensed milk in a large saucepan and add water to cover by several inches (about 8 centimeters). Bring to a boil, then reduce the heat so the water is barely simmering and simmer for 7 to 9 hours. This is important: You must make sure the can is always covered with water by a few inches (about 8 centimeters), so check it every half hour or so and replenish with boiling water as needed. Remove the can from the water and let cool before opening. A cautionary tale: Once when I was making this at the cafe, our gross negligence resulted in the water level dipping too low, exposing the pressurized can of milk. It exploded, the sound like a shotgun blast, sending a mighty spray of sweetened condensed milk everywhere. Don’t do this.
Excerpted from Baking at the 20th Century Café by Michelle Polzine (Artisan Books). Copyright © 2020.


Special thanks to the publisher who is offering three copies of this book to members in the US and Canada. Entry options include answering the following question in the comments section of this blog post.
Which recipe in the book’s index (besides the honey cake) would you like to make first?
Please note that you must be logged into the Rafflecopter contest before posting or your entry won’t be counted. For more information on this process, please see our step-by-step help post and this forum post. Once you log in and enter your member name you will be directed to the next entry option – the blog comment. After that, there are additional options that you can complete for more entries. Be sure to check your spam filters to receive our email notifications. Prizes can take up to 6 weeks to arrive from the publishers. If you are not already a Member, you can join at no cost. The contest ends at midnight on April 18th, 2021.
a Rafflecopter giveawayCategories
- All Posts (7079)
- Antipasto (2209)
- Author Articles (250)
- Book News (944)
- Cookbook Giveaways (996)
- Cookbook Lovers (262)
- Cooking Tips (116)
- Culinary News (299)
- Food Biz People (558)
- Food Online (800)
- Holidays & Celebrations (277)
- New Cookbooks (154)
- Recipes (1520)
- Shelf Life With Susie (231)
- What's New on EYB (134)
Archives
Latest Comments
- lexa25 on For the Love of Lemons by Letitia Clark – Giveaway
- lexa25 on Balli Balli – Cookbook Giveaway and Quick Bites
- charcb on For the Love of Lemons by Letitia Clark – Giveaway
- charcb on Balli Balli – Cookbook Giveaway and Quick Bites
- Jane on Introducing libraries to EYB at ALA
- fluffies on For the Love of Lemons by Letitia Clark – Giveaway
- Goulashgirl on Any way you slice it
- ChefClaireFVS on French at Heart – Cookbook Giveaway
- ChefClaireFVS on 20 Amici – 40 Ricette Cookbook Giveaway
- kitchen_chick on Salt Sugar MSG Cookbook Giveaway