Smoking Hot & Cold by Charlotte Pike
January 11, 2018 by Jenny Smoking Hot & Cold:
Techniques and Recipes for Smoked Meat, Seafood, Dairy, and
Vegetables by Charlotte Pike provides nearly 100 recipes
to add flavor and depth to our dishes in the form of smoke.
Of course, we are all familiar with smoking proteins but what
about smoking vegetables and condiments or even dessert? Charlotte
has us covered with chapters covering Fish, Cheeses & Butter,
Meat & Vegetables. These recipes transport us back to a
primeval way of cooking with smoky, succulent and mouthwatering
recipes that go far beyond the usual realm of barbecue ribs.
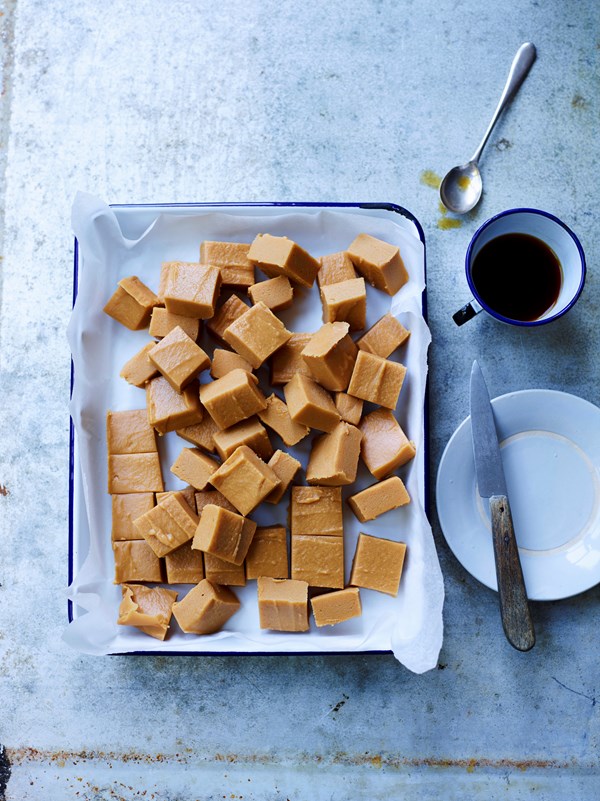
Photographs and instructions guide us through setting up and building our own smokers so that we can discover a new world of flavor with recipes that range from Smoked pork belly feijoada, Maple smoked brie with grilled peaches, Gnocchi with smoked butter & sage to Smoked butter fudge, the recipe for which we are sharing today.
Special thanks to Kyle Books, the publisher, for sharing the recipe and instructions for the Smoked butter fudge as well as for providing three copies of this title to our members in the US and UK. See our contest below on how to enter.
 Smoked butter fudge
Add this recipe to your Bookshelf (click the
blue +Bookshelf button).
Smoky fudge is unusual, but really delicious. I think it is best enjoyed outdoors, after a barbecue or as a campfire treat. The smokiness counters the intense sweetness well, and this is my favorite kind of fudge-soft, smooth, and creamy.
Makes about 60 squares
- 16 tablespoons (2 sticks) smoked salted butter (below)
- 1 x 14-ounce can condensed milk
- ¾ cup whole milk
- 4 teaspoons corn syrup
- 3½ cups granulated cane sugar
- 3 teaspoons vanilla extract
- 1 heaping teaspoon sea salt
Line a shallow 8 x 12-inch pan with nonstick parchment paper. Set aside. Put the butter, condensed milk, whole milk, corn syrup, and sugar in a large, heavy-bottomed saucepan. Heat over low heat, stirring regularly, until the sugar has completely dissolved.
Increase the heat and bring the fudge to a boil. When it reaches boiling point, set the timer and boil for 12 minutes. It should reach the soft-ball stage now. To test, carefully remove a teaspoonful of the mixture and drop it into a glass of very cold water. It should quickly form a soft, smooth ball. If the fudge is too runny still, boil for another 2 minutes and test again. Don’t boil for much longer, though, as it will be too firm.
Remove the pan from the heat, stir in the vanilla extract and sea salt, and set aside to cool for 10 minutes. Transfer the fudge to a stand mixer with a whisk attachment and beat for 5 minutes until thickened and the fudge has lost its sheen. You can also beat the fudge by hand in a very large mixing bowl with a wooden spoon if you don’t have a stand mixer. It is hard work though!
Transfer the fudge to the prepared pan. Smooth the top using a offset spatula, cover with plastic wrap, and put in the fridge to firm up for at least 4 hours. Carefully cut into squares. Keep in the fridge or an airtight lidded container for a couple of weeks.
Smoked butter
Add this recipe to your Bookshelf (click the
blue +Bookshelf button).
This is a great place to start if you haven’t smoked anything before. It’s quick, easy, and so delicious. Try melting smoked butter on steamed vegetables, grilled steaks, and even sweet treats, such as chocolate brownies, for an extra dimension of smoky flavor.
Makes 16 tablespoons
16 tablespoons (2 sticks) salted butter
Set up the cold smoker using a wood of your choice and light it. Put the butter in a heatproof, nonmetallic dish. When the smoker is at the correct stage (see page 11), with a thick cloud of smoke appearing in the cold chamber, add the butter and smoke for 30 minutes.
Remove the butter, wrap well, and store in the fridge. Leave it for 24 hours before eating.
The smoked butter will keep for up to a month in the fridge.
How to smoke
Hot smoking
Hot smoking takes place between 140 and 220 degrees F . You can go up to 240 degrees F, but I find that ingredients can dry out significantly if the temperature rises above 200 degrees F . The heat source is in the same chamber as the ingredient.
Stovetop hot smoker
The stovetop hot smoker is prepared as follows. Place 1½ to 2 tablespoons of small wood chips into the center of the base of your stovetop smoker. Set the drip tray on top of this (or cover with a large sheet of foil), and place the rack on top. Your prepared ingredients can now be put on the rack. Place the lid loosely on top, or slide the lid on, so that it is only just open. Set the smoker over the highest heat on the stove.
You can also place the hot smoker on a hot barbecue or wood fire outdoors. When smoke starts to appear just a few wisps at first close the lid fully (use a cloth it is surprisingly easy to burn yourself doing this) and reduce the heat to the stove’s lowest setting before leaving to smoke. Check how your ingredients are progressing after the minimum cooking time is up. You may want to keep going until the color changes and the ingredient is cooked through, or you may want to achieve a very light smoke. To continue smoking, close the lid and keep the smoker on the lowest heat.
Outdoor hot smoker
Fill the chamber with charcoal about two-thirds full, but check instructions if you are using a bought smoker or grill and place 1 to 3 handfuls of wood chips on the top, if you are using them. Light the smoker using a chemical-free lighter, and allow the fire to take, leaving the lid open and allowing the air to flow through. This should take about 10 minutes. When the fire takes, let it burn or use the fire to grill until it dies down and your smoker reaches the correct temperature when it gets to 220 degrees F you should be good to go as the temperature will start to drop from this point. Do use a thermometer to monitor the temperature. Your ingredient should be smoked before the fire dies out, but if the temperature really drops, you may need to stoke or relight the fire. Adding plenty of fuel (charcoal) at the start should help you achieve a long burn, but you will quickly get a feel for how your smoker works. Another smoking option is to put a small foil tray of water into the smoker, which will lower the temperature in the smoker.
Cold smoking
Light your cold smoker in the same way as an outdoor hot smoker.
I use a metal incinerator can as the heat source and inside I have
two large, clean metal cans (see opposite). One is sat upside down
on the base, and the second is placed the correct way up on top of
that. The top can is filled with charcoal and wood chips and lit.
As soon as the charcoal is lit, place the lid on and allow the
smoke to start to generate. Set the smoking chamber higher than the
heat source either on a step or on a heatproof patio table or
chair, as long as it is secure. Extend the piping as far as you
can, which allows the smoke to cool as it travels into the smoking
chamber.
Excerpted from Smoking Hot and Cold by Charlotte
Pike ©2017 courtesy of Kyle Books. Photography by Tara
Fisher.

The publisher is offering 3 copies of this book to our EYB Members in the US and UK. One of the entry options is to answer the following question in the comments section of this blog post.
Which recipe in the index would you try first?
Please note that you must be logged
into the Rafflecopter contest before posting or your entry won’t be
counted. For more information on this process, please see our step-by-step help post. Be sure
to check your spam filters to receive our email notifications.
Prizes can take up to 6 weeks to arrive from the
publishers. If you are not already a Member, you can join at no cost. The
contest ends at midnight on February 18th, 2018.
Categories
- All Posts (6921)
- Antipasto (2123)
- Author Articles (247)
- Book News (934)
- Cookbook Giveaways (981)
- Cookbook Lovers (257)
- Cooking Tips (107)
- Culinary News (299)
- Food Biz People (552)
- Food Online (790)
- Holidays & Celebrations (272)
- New Cookbooks (149)
- Recipes (1497)
- Shelf Life With Susie (231)
- What's New on EYB (133)
Archives
Latest Comments
- gamulholland on Best of the Best 2024
- JimCampbell on How did iconic pasta shapes get created?-
- Wineberry on Heritage Cookies of the Mediterranean World – Cookbook Giveaway
- JessHeilman on Heritage Cookies of the Mediterranean World – Cookbook Giveaway
- smartingreece on How did iconic pasta shapes get created?-
- FuzzyChef on How did iconic pasta shapes get created?-
- PhillipJD on The Golden Wok – Cookbook Giveaway
- porcupines on JoyFull – Cookbook Review & Giveaway
- porcupines on Heritage Cookies of the Mediterranean World – Cookbook Giveaway
- BMeyer on Feasts of Good Fortune Cookbook Giveaway